JavaScript3大フレームワークの中で最も学習コストが低い(主観)、Vue.jsに入門しました。
Vue.jsでTodoListを作る、というチュートリアルはブログ等で既に幾つも記事がありますが、この記事ではTodoListを作る事でVue.jsの何について理解できるか(=理解できたか)、を主眼として書いていきます。
ほとんど自分の理解の棚卸しになりそうですが、参考になれば!
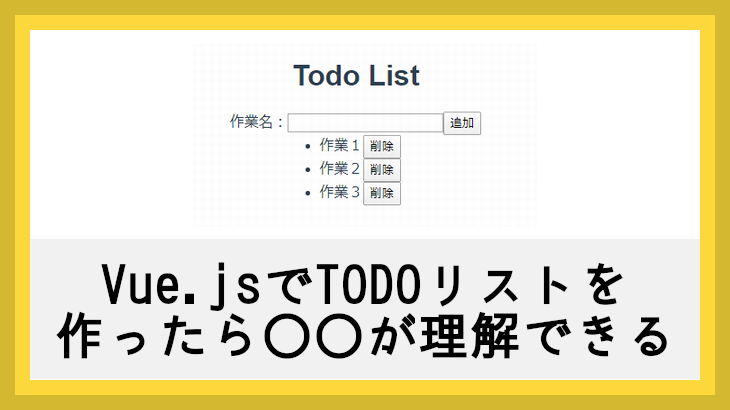
完成イメージ
最終的には以下のTodoListを作ります。UIはもう少し改善の余地がありますが、Vue.jsの理解からは少し外れるかと思い、そこまで詰めてないです・・・。
全体のコード
先にコードから見たほうがイメージがつかみやすい気がしました。
App.vue
親コンポーネントとなるvue
<template>
  <div id="app">
    <h1>Todo List</h1>
    <span>作業名:</span><input v-model="task" type="text"><button id="add" v-on:click="addTodo">追加</button>
    <todo-list v-on:remove="removeTodo" v-bind:items=todos></todo-list>
  </div>
</template>

<script>
import TodoList from './components/TodoList.vue'

export default {
  name: 'app',
  components: {
    TodoList
  },
  data: function() {
    return {
      task: "",
      todos: [],
      count: 0,
    }
  },
  methods: {
    addTodo: function() {
      if (this.task === "") {
        alert("作業名を入力してください");
        return;
      }
      this.todos.push({
        message: this.task, id: ++this.count
      });
      this.task = "";
    },
    removeTodo: function(event, index) {
      this.todos.splice(index, 1);
    }
  },
  mounted: function() {
    this.todos = JSON.parse(localStorage.getItem("todos")) || [];
    // this.todos = [];
    const todos = this.todos;
    this.count = this.todos.length;
    window.onbeforeunload = function() {
      localStorage.setItem("todos", JSON.stringify(todos));
    }
  }
}
</script>

<style>
#app {
  font-family: 'Avenir', Helvetica, Arial, sans-serif;
  -webkit-font-smoothing: antialiased;
  -moz-osx-font-smoothing: grayscale;
  text-align: center;
  color: #2c3e50;
  margin-top: 60px;
}
</style>
TodoList.vue
子コンポーネントとなるvue
<template>
  <div>
    <ul id="todolist">
      <li v-for="(item, index) in items" v-bind:key="item.id">
        {{ item.message }}<button id="remove-button" @click="$emit('remove', $event, index)">削除</button>
      </li>
    </ul>
  </div>
</template>

<script>
export default {
  name: 'todo-list',
  props: {
    items: {
      type: Array,
      default: function() {
        return [];
      }
    },
  },
}
</script>

<!-- Add "scoped" attribute to limit CSS to this component only -->
<style scoped>
h3 {
  margin: 40px 0 0;
}
ul {
  /* list-style-type: none; */
  text-align: left;
  padding: 0;
  width: 100px;
  white-space: nowrap;
  margin: auto;
}
li {
  display: list-item;
  margin: 0 10px;
}
a {
  color: #42b983;
}
</style>
TodoList作成を通して理解できること
親コンポーネントから子コンポーネントの値連携
propsを使用する。
親側で、紐づいているコンポーネントのタグ内にv-bind:プロパティ名=値を記述する事で、子側に連携される。

App.vue
親側からtodosという値がitemsというプロパティ名で連携される。
<todo-list v-on:remove="removeTodo" v-bind:items=todos></todo-list>
  data: function() {
    return {
      task: "",
      todos: [],
      count: 0,
    }
  },
TodoList.vue
子側でitemsという値を受け取り、使用する。
<ul id="todolist">

<li v-for="(item, index) in items" v-bind:key="item.id">
        {{ item.message }}<button id="remove-button" @click="$emit('remove', $event, index)">削除</button>
      </li>

    </ul>
  props: {
    items: {
      type: Array,
      default: function() {
        return [];
      }
    },
  },
子コンポーネントから親コンポーネントのイベント連携
$emitを使用する。
イベント名で親と子を紐付ける。必要に応じてパラメータも渡すことが可能。

TodoList.vue
削除ボタンのクリック時に、イベント名としてremoveを、パラメータとしてDOM要素とindexを渡す。
<ul id="todolist">

<li v-for="(item, index) in items" v-bind:key="item.id">
        {{ item.message }}<button id="remove-button" @click="$emit('remove', $event, index)">削除</button>
      </li>

    </ul>
App.vue
イベント名removeで受け取り、removeTodoを呼び出す。
<todo-list v-on:remove="removeTodo" v-bind:items=todos></todo-list>
リストレンダリング
JavaScriptのfor inの形で要素を展開できる。第1引数が要素、第2引数がindexとなる。
    <ul id="todolist">
      <li v-for="(item, index) in items" v-bind:key="item.id">
        {{ item.message }}<button id="remove-button" @click="$emit('remove', $event, index)">削除</button>
      </li>
    </ul>
フォーム入力バインディング
双方向データバインディングしたい要素にv-model=プロパティ名を指定する。
App.vue
この場合、taskというプロパティと紐づき、変更が監視される。
<span>作業名:</span><input v-model="task" type="text"><button id="add" v-on:click="addTodo">追加</button>
  data: function() {
    return {
      task: "",
      todos: [],
      count: 0,
    }
  },
イベントハンドリング
イベントを追加したい要素にv-on:イベント名を追加する事で、指定のイベントをハンドリングできます。
また、公式のリファレンスでは指定可能なイベント種類の記載がありませんでしたが、以下Qiitaの記事でまとめられておりました。

App.vue
以下の場合、追加ボタンクリックでaddTodoを実行する。
<span>作業名:</span><input v-model="task" type="text"><button id="add" v-on:click="addTodo">追加</button>
  methods: {
    addTodo: function() {
      if (this.task === "") {
        alert("作業名を入力してください");
        return;
      }
      this.todos.push({
        message: this.task, id: ++this.count
      });
      this.task = "";
    },